
Last year I came across this video showing a Raspberry Pi hooked up to a barcode scanner in an ingenious setup that automated the creation of shopping lists on Trello:
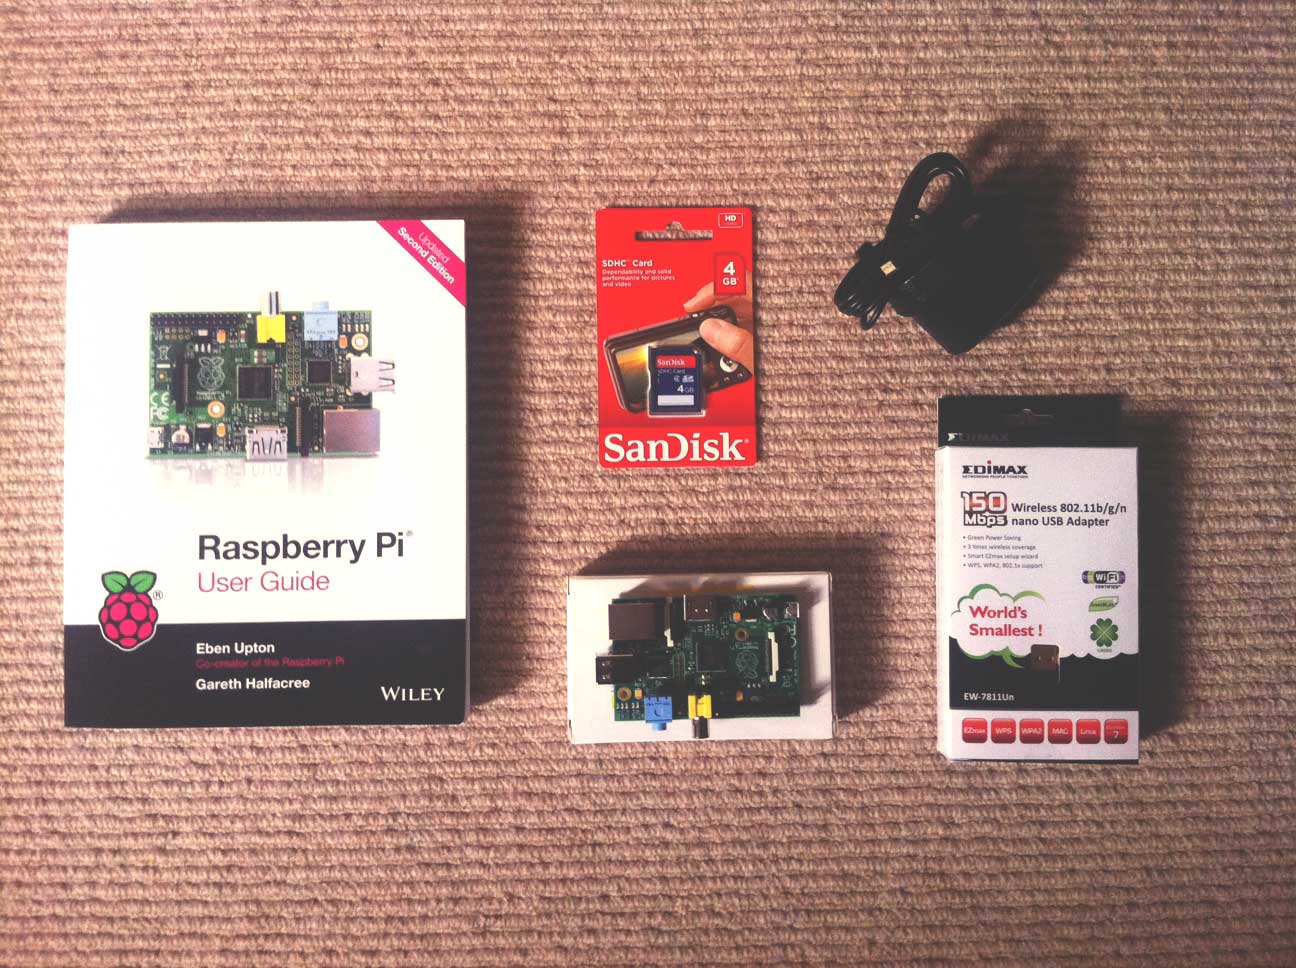
As Christmas was coming up and family were searching for presents to get me, I thought it was the perfect time to get a Pi and some extra kit for it. Here’s what Santa got me:
- Raspberry Pi Model B
- Micro USB Power Supply
- SanDisk 4GB SD Card
- Raspberry Pi User Guide
- Edimax Wireless Nano USB Adapter
After the initial excitement of Christmas day died down and the hectic New Year set in I couldn’t find any spare time to set it up. I was also hesitating until I had decided on a use for it. I wanted to find a useful and / or cool job for it. I toyed with the idea of recreating Oscar from the video, I didn’t need a media center and as much as I would love to use it to power a robot, it didn’t seem likely.
The Problem to Solve
I have had a fairly decent HP printer for a few years now, that works well but is just a little too old to have been fitted with wireless support. This has always presented a hassle of having to move our laptops to plug it in when we want to print and does not support AirPrint from our iPhones or iPad. It always seemed completely wasteful to ditch the printer for a newer wifi one, so we persevered until this morning when the idea came to me. Use the Raspberry Pi as a print server.
A brief google on the subject showed this was a popular use for the Pi and there seemed to be plenty of tutorials on the subject. Great, my Sunday project was on!
Setting up the Raspberry Pi
Before I could start thinking about the print server I had to get my Pi and equipment unboxed and setup. I had read a lot about installing the New Out Of Box Software (NOOBS) on my SD card, but decided on just installing the Raspbian OS on the card.
Preparing the SD Card
Here are the steps I followed using this tutorial:
- Download Raspbian wheezy
- Format SD card
- Unmount SD card
- Flash SD with Raspbian image(this can take a few minutes)
- Eject SD and insert into Pi
Turning it on
I then connected my monitor via HDMI, my USB keyboard and mouse via a dongle (to leave a USB slot free for the Wi-Fi adapter) and then the micro USB power cable which turns on the machine.
When the Pi had finished booting I was shown the Raspberry Pi Software Configuration Tool screen, where I expanded the file system and set the boot to go to the desktop.
I then plugged in the Wi-Fi adapter and configured it via the Wi-Fi config icon on the desktop but I could have followed this in the terminal.
Connecting Remotely with SSH
Once the Pi was connected to my router I could connect remotely to it with my Macbook via SSH in the terminal with this command and entering the password for Raspberry Pi when prompted:
ssh 192.168.1.x -l pi
I generally connect to machines, without entering passwords, with SSH keys and so I used this command from this tutorial:
cat ~/.ssh/id_rsa.pub | ssh pi@192.168.1.x "mkdir .ssh;cat >> .ssh/authorized_keys"
I also like to give aliases to my SSH connections, so I added this to my ~/.ssh/config file:
Host pi
   HostName 192.168.1.x
   User pi
   IdentityFile ~/.ssh/id_rsa
The Print Server
Now down to business. Here are the steps I followed using this tutorial:
- Update packages
- Install required packages
- Configure CUPS
- Connect printer to the Pi and configure with CUPS
- Print test page via CUPS admin
- Print tests from Macbook and various iOS devices.
Helpful Resources
- Getting Started with Raspberry Pi: Installing Raspbian
- Raspberry Pi – Installing the Edimax EW-7811Un USB WiFi Adapter (WiFiPi)
- Logging into a Rasberry Pi using Public/Private Keys
- Configuring the Raspberry Pi as an AirPrint Server
- Wireless Printing/AirPrint Server via the Raspberry Pi
This all went surprisingly without a hitch and it is great to have wireless printing in the house with the added bonus of now being able to print from our iOS devices.
Have you got a Raspberry Pi? What are you using it for?
Thank you for sharing your project and making it easy to do the same.
You are welcome, glad it was useful
Thanks for sharing , I have connected the Zebra barcode label printer and tested after doing this all procedure you mentioned in your article. I found the pi is printing the test page from windows correctly on that printer but if
i print the label designed or command file to it, it prints in dump mode, not able to understand commands, and i not getting printed label as i have designed , instead i am getting data on label as seen on my screen.
I would like to make something like this, I’m not exactly tech savvy with networking and only understand the basics of SSH. But, I could leave a port open on my network then tunnel into the raspberry pi from an external network, so I could say, print a forum my father or girl friend needs to sign, or just some paper they might need? Please respond as I see this post is slightly old.